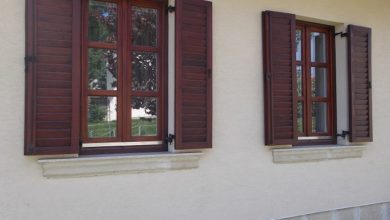
If you’re here, it means you have a shingle roof in need of some TLC. Whether you’re trying to repair it yourself or are just curious about DIY shingle roof repair, this comprehensive guide is for you! Even if you’re a first-timer when it comes to roof repair, don’t worry. We’ll be providing a thorough, step-by-step rundown of the entire process, so you’ll be able to effectively and efficiently tackle the job. Plus, we’ll also provide insider tips and tricks to ensure you get a safe, long-lasting result.
Quick Clarification
You can repair a shingle roof by replacing damaged shingles and ensuring the area is properly sealed. It is recommended that you consult with a professional roofer if any major damage is present, as it can be dangerous to attempt complicated repairs without knowing what you’re doing.
Shingle Roof Damage Inspection
In order to properly repair your shingle roof, it is important to inspect the damage and understand how it happened so that you can address the right issues. Damage can range from missing or broken shingles to curling, buckling, dry rot, algae growth and weathering. The age of the roof should be taken into consideration when inspecting for damage, as well as location—a shingle roof may face more wear and tear in coastal climates where high winds and humidity are common.
Start by walking around the perimeter of the roof on a level surface and use a pair of binoculars. Look for any signs of wear or damage such as broken/missing/curled shingles, damaged flashing, dry rot, vegetation growth and tears in the underlayment. It is also beneficial to monitor areas prone to water infiltration like valleys, eaves and ridges. After identifying potential areas of concern, you should climb onto your roof and do a closer inspection. It is important to take safety precautions when on the roof—position yourself away from edges, eaves and roof penetrations while wearing a safety harness. Take note of any wear or damage you find during this closer inspection and begin creating a plan for how to address each issue.
When looking at wear and tear on your roof due to age-related deterioration (for example old asphalt shingles) it must be decided whether replacement or repair is needed. On one hand replacement will cost more in terms of money but less time and labour compared to the alternative of repair which would take more effort and time however much less money upfront. This decision ultimately depends on several factors including the condition of the roof, its age and budget.
Now that you have inspected your shingle roof for damage—it’s time for the next step: assessing wear and tear in order to determine what needs repairing and replacing before beginning work on your DIY project.
Assessing Wear and Tear
When assessing the wear and tear on a shingle roof, it is important to note both cosmetic damage, as well as any potential structural concerns. Cosmetic damage usually includes things like discoloration, chipped or cracked shingles, moss build-up, and curling. However, these imperfections should not be seen as just an aesthetic issue; cosmetic damage can indicate more serious underlying issues that must be examined before repairs begin.
Structural issues are often much more difficult to detect without taking a closer look at the roof’s underlayment and felt paper. Shingles that have become loose or detached from the roof board could mean that proper nailing of the shingles was not done during installation or that replacement is due to age and weathering. Wet or rotted sheathing boards can also be indicative of improper flashing, inadequate sealant application, or poor ventilation within the attic space.
In some cases, there may be no visible signs of roof damage and yet still present some underlying issues. If this is the case, then homeowners are recommended to contact a professional roofer to assess whether further diagnostics are necessary prior to making any repairs. Homeowners should consider both sides when deciding whether to hire a professional roofer or complete the DIY route – while a professional assessment can ensure all potential problems are quickly identified and resolved correctly, the DIY approach taken with caution can help save time and money in the long run.
To ensure lasting results on any repair project, it is important to identify all potential causes of damages before beginning work. With this in mind, the next section will outline some key considerations for evaluating weather impacts on a shingle roof and determining necessary steps for repair.
- The national average cost to repair a shingle roof is $497.
- The cost of repairing shingle roofs typically ranges from $0.50-$3 per square foot, depending on the extent of damage and requirements for replacing materials.
- According to HomeAdvisor, most homeowners spent between $203 and $710 on average for minor repairs like patching up cracked or missing shingles.
Identifying Weather Impacts
When undertaking any roofing project, it is important to be aware of the weather forecast beyond the day of repair. If a storm is coming in or temperatures are too high or low, a shingle roof repair project must be postponed. Weather impacts can cause further damage and make repair more difficult if the right precautionary steps are not taken.
In areas with mild climates, summer is often the ideal time for DIY shingle roof repairs. Temperatures during these months are warm enough for adhesive to properly set but not too hot for the workers to overheat. Mild seasonal winds also offer an advantage since they will not increase the chance of falling debris from damaging cars or property near the home.
However, when winter approaches and temperatures drop below freezing, it is no longer safe to conduct DIY roof repair as snow and ice can complicate installation on multiple levels due to long delays waiting for thawing of adhesive and safety concerns associated with cold weather construction work. For example, asphalt shingle installations require special tools for nailing that become stiff and unreliable in cold temperatures and snow can cause insulation problems inside the home.
It’s important to be mindful of weather changes when performing any outdoor DIY project and especially so when repairing a shingle roof. As mentioned, it is best to postpone any jobs until proper conditions return. With this in mind, let’s look at what materials and supplies you need to move forward with your shingle roof replacement project.
Main Summary Points
Weather is an important factor to consider when beginning any DIY shingle roof repair project. Summer months with mild temperatures and winds are generally the ideal time for repairs. When winter arrives, temperatures can become too cold for safe construction work and snow and ice will complicate installation. It is best to wait for favorable weather conditions before starting any roofing project. Furthermore, special tools and materials are required for successful installation.
Shingle Roof Replacement Materials
Replacing the shingles on your roof is one of the most important steps when it comes to DIY shingle roof repair. When selecting the right materials for replacement, it’s important to ensure that the job is done properly and with quality materials. This includes selecting the type and color of shingles, whether to use new or used shingles, as well as which nails and tarps will be needed.
When selecting the type of shingle, asphalt is typically recommended due to its affordability, durability, and minimalist design options. These types of shingles come in a variety of colors and can match existing roofs or add a bit of color to a building’s exterior. It’s possible to opt for slate or metal shingles if desired, but asphalt is generally best for most budgets and projects.
The decision between using new or used shingles can be tricky. On one hand, used ones are often more cost-effective; however, they may not provide adequate protection for your roof over time. Accordingly, many suggest opting for new – albeit more expensive – materials when replacing shingles as these will likely last longer than cheaper models.
Regarding nails and tarps, galvanized roofing nails are typically recommended as they won’t rust despite prolonged exposure to moisture. Meanwhile, roof tarps should be made with superior all-weather capabilities so that they can weather rainstorms without tearing easily.
Finally, before starting the project, make sure you have all of the right materials on hand in order to complete the job effectively. This means obtaining enough new and/or used shingles, nails, tarps, and other necessary items before beginning work on the roof.
Now that you know what materials to use when replacing your shingles, it’s time to select the right ones for your project. In the following section we’ll discuss how to choose the perfect shingle color and texture for your home or building’s needs.
Selecting the Right Shingles
When it comes to DIY shingle roof repair, selecting the right shingles is one of the most important steps. Not only should you choose a product that is aesthetically pleasing and fits within your budget, but you also need to make sure that it is the correct product for the task. Depending on your location, potential weather exposure, and other factors, there are many types of shingles you may want to consider.
Organic-based shingles offer excellent strength, durability and resistance. They are long lasting and cost efficient, although they are often heavier than other types and require extra care during installation. Fiberglass-based shingles are very lightweight making them much easier to work with during installation, however they may be more prone to cracking from extreme temperatures or harsh weather conditions. A hybrid option is also available that offers a combination of both organic and fiberglass materials for a stronger roof with less heft.
No matter which type of shingle you select, make sure it is designed to withstand your local climate as well as having the correct fire rating for your state or municipality regulations. In addition, pay attention to the quality of material used in order to save yourself money in repairs down the road. Although higher quality products may cost more at purchase, in the long run they will provide better value by offering maximum protection against weather elements without requiring frequent repair or replacement.
Now that you have selected the right shingles for your roof repair project, let’s move on to the shingle roof repair process in the next section.
Shingle Roof Repair Process
When it comes to DIY shingle roof repair, the process begins with an inspection of the roof area. You should check for signs of damage or wear, such as cracked, curled, or worn shingles, as well as any loose or missing flashing and other signs of wear or damage. If your inspection reveals these issues, you will need to make repairs to your roof before continuing with the repair process.
The next step is to remove the affected shingles. This can be done by loosening them from the nails that hold them in place and then gently sliding them off from underneath another shingle. Depending on the scope of the repair you are performing, you may need to pry off multiple rows around the damaged area. When removing them, be sure to be gentle so you don’t damage any of the surrounding shingles that may still be good.
Once all of your damaged shingles have been removed, you will need to install new ones. Begin by measuring and cutting each new shingle to fit in its spot before laying it down on top of the adjacent layer and driving a nail through its middle into the surface beneath. Be sure to drive each nail at a 45-degree angle angling upwards and towards the center of the shingle. Make sure that all of your nails are situated along your roof line and not overhanging in order to provide maximum strength and stability for your roof deck beneath.
Finally, consider adding tar paper and rolled roofing material beneath each new shingle for extra protection and water resistance. This is especially important if you live somewhere that experiences heavy winter rains or snowfall accumulations. Again, be sure all materials are properly applied in order for them to function as intended.
With a few simple tools and some patience, DIYers can easily perform their own shingle roof repairs, giving their home an extra layer of protection while saving money in their pocketbook in the long run!
Now that we know what needs to occur during a DIY Shingle Roof Repair process, let’s take a look at the necessary tools and materials required for this task in our next section.
Necessary Tools and Materials
When performing DIY shingle roof repair, it’s important to be prepared with the right tools and materials. The most essential of these items include: shingles, galvanized nails, a hammer or nail gun, protective eyewear, a ladder or scaffolding, a utility knife and measuring tape, a water-resistant sealant, and felt paper.
Having the correct materials ensures that the project goes smoothly and efficiently. Shingles are available in different types depending on your specific location and desired look — such as asphalt shingles or metal shingles — as well as various shapes and sizes. Galvanized nails will prevent rusting against any future moisture. A ladder or scaffolding will ensure safety when working at a high height, while waterproof sealants will help protect all aspects of the roof from potential water damage. Felt paper provides an extra layer of protection against the elements.
In some cases, it may be beneficial to purchase additional supplies such as roof cement for sealing ridge cap joints or flashing along ridges and valleys; or roof primer for improving adhesion of new to old surfaces. However, this is not always necessary and should be evaluated on a case-by-case basis.
Now that you have all the necessary tools and materials, you can move onto the next step in your DIY shingle roof repair: installing felt, moisture barriers and sealants.
Installing Felt, Moisture and Sealants
Installing felt, moisture and sealants are important steps in the roof replacement process. While felt doesn’t hold up to weather well, it can still provide an extra layer of protection. Skilled professionals use modified bitumen membranes that have been designed to resist UV rays better, this form of felt is professionally installed over existing underlayments. Primers and adhesives are also required when using modified bitumen, as they ensure a long-lasting bond between the underlayment and the top grade shingles.
Next, installing vapor barriers is necessary to prevent moisture from seeping up into the roof and damaging it. This is usually done as an extra set of protection on top of water-resistant roofing materials like cedar shakes or asphalt shingles; however, additional vapor barriers may be needed for older traditional roofs. Lastly, sealants should be applied around chimneys, skylights and other penetrations, to close off any gaps that would allow moisture to get in.
Now that felt, moisture and all necessary sealants have been properly installed; with added protection against water damage from below and from the outside elements, you can proceed with shingle roof repairs and further inspection selections such as checking for problem areas in the attic space.
Shingle Roof Repairs and the Attic
The attic of your home plays an essential role in the repair process when it comes to shingle roof repairs. On one hand, an attic can provide homeowners with more space to access both their roof and
the insulation which is necessary to effectively carry out a repair. Plus, an attic can act as an additional layer of protection between potential sources of damage such as wet weather or severe storms outside.
On the other hand, attics can bring their own set of problems when it comes to shingle roof repairs. They may be drafty and cold, making it difficult to work on some tasks such as insulation replacement. Additionally they can be so cramped that basic equipment like ladders have trouble fitting through narrow access points.
It is important for homeowners to be familiar with their own attic space, understand its limitations, and explore how best it can be used when conducting a DIY shingle roof repair. The best way to do this is by consulting with a qualified roofing contractor for advice and tips before beginning any job. With careful consideration and preparation around the role of the attic in shingle roof repairs, you will be well-equipped to tackle the project ahead of you.
Now that we have discussed all aspects of shingle roof repairs and the attic, let’s focus our attention on the next section: whether or not it is better to hire a professional roof repairer or attempt the repair yourself?
Professional Roof Repairer or DIY?
Whether to use a professional roof repairer or engage in DIY shingle roof repair is a challenging decision for many homeowners. While a professional roofer will be able to quickly identify and address any underlying issues, tackling the repairs on your own can provide substantial savings.
Benefits of using a Professional Roof Repairer
A professional roof repairer is experienced and extremely knowledgeable when it comes to handling roof repair tasks. A job performed by an expert will often include inspections of the structure and other related areas to ensure all problems are identified, assessed and addressed. This includes the replacement of any damaged components that may be present. In addition, the overall quality of the finished project will be higher; repairs made by somebody with no prior experience may not last as long as those done by a professional.
Benefits of DIY Shingle Roof Repair
For those that are willing and able to take on the task, there are some considerable advantages to handling shingle roof repair on their own. DIY work offers substantial cost savings, as you won’t have to pay for labor costs associated with having someone else do the work for you. Furthermore, if you have the skillset necessary for taking care of the repairs yourself, you’ll likely see quicker results and save time that would have been spent scheduling appointments with professionals.
Making the decision between professional roof repairers and DIY shingle roof repair comes down to assessing your own capabilities and budget. If you feel comfortable doing the job yourself, you might find substantial savings in performing it without assistance from a professional service provider. However, if money is not an issue or safety concerns exist due to lack of expertise, hiring a specialist might make more sense in terms of achieving quality results in a shorter amount of time.
Common Questions Answered
How much time should I allocate for the repair of a shingle roof?
The amount of time it will take to repair a shingle roof will depend on the size and complexity of the roof, as well as your own skill level and the tools available to you. Generally speaking, if you are a novice DIYer with minimal experience and basic tools, you can expect to spend approximately 2-3 days on the project. More experienced DIYers or those with specialized equipment may complete the same job in about 1 day. Additionally, if there are additional damaged components such as decking material or flashing that need to be addressed, additional time may be needed. This guide offers helpful tips and advice for all skill levels to give you an idea of how long the repair process should take.
What tools and materials do I need to repair a shingle roof?
In order to repair a shingle roof, you will need several tools and materials. The most important items are protective gear such as safety glasses, dust mask, and work gloves; a ladder to access the roof; shingles to replace any damaged ones; and of course, roofing nails and a hammer. Additionally, it’s handy to have a pry bar for removing old nails, a power drill for setting the new nails in place quickly, an extendable snow rake for removing debris from your roof’s surface, and potentially patching material and sealant. Additionally, if you don’t feel safe getting up on the roof and you live in a region prone to extreme weather or ice build-up, it may be advisable to hire a professional.
What safety measures should I take for shingle roof repair?
When it comes to roof repair work, safety should always be a top priority. Here are some of the safety measures you should take before beginning any shingle roof repair project:
1. Wear protective equipment such as gloves, hard hat, long-sleeved shirt and pants, and safety goggles.
2. If you are going to be up on the roof, make sure to use a ladder that is stable and secure. You should also have someone hold the ladder for extra support.
3. Use additional safety gear such as a rope or harness if you are working from heights or on slippery surfaces.
4. Never try to repair a roof in bad weather (heavy rain, snow or wind). Wait for better conditions before starting your project.
5. Make sure you have the right tools and materials on hand before starting the shingle roof repair job. Your book will help ensure that you have everything you need so make sure to check it over before getting started.
6. Take regular breaks while working to stay fresh and prevent fatigue.
By following these simple tips, you can be sure that your DIY shingle roof repair job will be accomplished safely and without any unwanted surprises!